Monday, December 26, 2011

Construction Themed Birthday Party

Well we finally had the Construction Themed Birthday Party.

Now before I show you all the pictures (and believe me there are a lot of pictures) I want to tell you that I went a little crazy for this party. I think I wanted this party to be perfect because the last party I threw for my eldest son wasn't my best work as I was quite unwell at the time. So with this party I really went all out with the details.

It all started with the food table. I wanted everything I served to fall into the theme. Take a look at how I put it together:
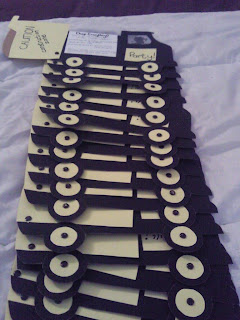
And I thought it would be a cute idea to have all the cutlery and crockery in a toolbox as if it was equipment and supplies:
I also did a box for the presents to be put into. The box was the "dump" area.
And in my craziness for the party I even "dressed up" the bathroom for the occasion:
Then there were the activities I prepped for the kids to do. There was a corner of building blocks and a sandpit, which was meant to be outside but it was raining so bless my amazing husband for putting it in our kitchen. Brave I know but it really wasn't bad at all. These 2 activities were set up to keep the kids busy until the main activities.
Then for the main activities I had colouring pages and cupcake decorating.

For the main food I served wheel shaped mac and cheese.
And then there was the cake, I am crazy about how the cake turned out. I even had a saw shaped knife to cut the cake. Like I said: "every little detail"!!!!
Isnt this picture with the lights off really cute? A friend of mine said it looks like a construction site at night.
Did you notice all the little signs I had around the party??? Well I think they were one of my favourite things at the party. Here are some more that I had around the place:
Lastly I had a "clock out" section for the end of the party where the kids got the party favours before they left.


So I know that this post was very, very, very full of pictures but I just really wanted to share all the details.
Hope you enjoyed taking a look because I sure enjoyed putting it all together.

Wednesday, December 21, 2011

On the first day of Channukah.............

                                                    HAPPY HAPPY CHANUKAH!!!!

So today my eldest son and I decided to do something fun together for the 1st day of Chanukah.  It was a very quick and easy project but also so much fun. We made the yummiest biscuits in the shape of candles. And they came out so well.

Take a look:


And the recipe is so easy:

Ingredients:

150g butter (cut into small pieces)
2 cups flour
1/2 cup sugar
1 tsp vanilla essence

Directions:

  1. Preheat oven to 350 degrees F (180 degrees C).
  2. Sift flour, add the butter and rub in with your fingers until the mixture resembles breadcrumbs. 
  3. Stir in the sugar and vanilla essence.
  4. Mix together to form a firm dough. 
  5. Roll out the dough on a lightly floured work surface. 
  6. Using a cookie cutter of your choice cut out biscuits. 
  7. Arrange the biscuits on a baking tray. 
  8. Bake for 15-20 minutes, or until the biscuits are a light golden colour. 
  9. Transfer the biscuits to a wire rack and allow to cool completely.


Monday, December 19, 2011

Little things in life!!!

I know that all my posts so far have been about parties and anniversaries and all sorts of crafts,  but tonight I want to post about something a little different. Tonight I want to post about the amazing community my husband and I (and our boys too of course) have become apart of.

One of the greatest things about this community is how caring and thoughtful everyone is. For example one of the things we do is whenever someone has just had a baby or is sick we get together to make sure that the family has meals made and delivered to them for at least a week.

So the other day I was actually making a meal for a family and it just got me thinking about the times that the same thing has been done for me and my little family, and it just makes me so proud to be part of such a great community and to be friends with such amazing people.

It is very easy to always be talking about the big things in life, but sometimes (just once in a while) it is also nice to take a moment and show appreciation for the small (yet amazing) things in life.

I know this isn't like anything I have ever posted about before but I really just wanted to say how grateful I am to these special people in my life.

To my community: Thank you.

Tuesday, December 13, 2011

A Sneak Peak of our Angels' Construction Themed Birthday Party:The Invitation

As you all know this month is full of reasons to celebrate, and one of those reasons is our little Angel's 4th Birthday. Although I guess he isn't so "little" anymore!!!!

So for his party I decided to throw him a Construction Themed Birthday Party and we are inviting the boys from his class as well as some friends that are not in his class. So for this post I want to share the invitations I made for the party. Note: because we are inviting the boys from his class as well as other friends from outside of his class I landed up making an English and Hebrew version of the invitation.

Here is the English version:


 And the dump truck part opens up to reveal the party information:


 And here is the Hebrew version:


 Here are all the invitations I made, all ready to be handed out:


I really love how they turned out. I thought it was quite cute to add a picture of the birthday boy to the truck, to make it look like he was the driver of the truck. And I also love the "sand" in the truck. I will be posting more about the party once its been.

Stay Tuned!!!!

Sunday, December 11, 2011

Scrappy Sunday (sort of): The Date Box

Today I want to share the gift I made for my husband for our Anniversary. The gift is a Date Box which is a promise of 12 dates (one date a month for a year) until our next Anniversary. The box is a wooden box which I decorated with some pretty scrapbooking paper.

Why a wooden box you ask??  Because the traditional anniversary gift for 5 years is wood and I had to bring that into the gift somehow.

Here are some pictures of the gift:

 (sorry about the light in the middle of this pic)
And here is the inside of the box:

As you can see there are 12 compartments (each compartment represents a month in the upcoming year) and in each one there is a clue as to what the date will be. (I mean you didn't really think I would let my husband know what each date was up front, did you??). Where's the excitement in that??).

Then on the lid of the box I stuck an envelope and inside the envelope was a little note explaining what the date box was.


I have also made 12 other envelopes containing notes which I will give to my husband at the beginning of each month and that way he will have more clues as to what that months date will be.

Hope you enjoyed my post today, I sure enjoyed sharing it with you.